Nothing is wrong in saying that better communication and team collaboration are the main pillars of business success. The latter “strategic team collaboration” occupies a front seat in today’s competitive era. To enhance team efficiency, the New Outlook has introduced the ‘shared mailbox’ feature. It is specifically designed to achieve collective efficiency. Let’s understand what is a shared mailbox in New Outlook. It is basically a designated email address. Let’s understand it with a use case. A team is working for addressing product concerns or complaints. Such team can use a single shared email id (e.g., support@zxy.com) to close customer complaints. It leads to quick disposal of such concerns. Thus, paving the way to achieve enhanced customer satisfaction level. Shared mailboxes don’t require separate login credentials. An access permission by Microsoft 365 admin is required to access the mailbox.
Multiple organizations across the globe use shared mailboxes for following functions:
- Customer Support
- Sales, Marketing and Business Development
- HR or Administrative Communication
- General Inquiry Handling
Many users often query ‘How to Add a Shared Mailbox in New Outlook?’ In this guide, we will try to cover all details associated with this subject. This post will tell you how to integrate shared mailboxes seamlessly. In addition to this, it will also suggest circumstances when a user needs to employ on OST to PST Converter Software.
Benefits of a Shared Mailbox:
Since all email messages are stored in a single folder, it prompts to quick disposal of concerns and queries
- Centralised communication means better delivery of team functions
- It reduces the TAT (Turn Around Time) of queries as multiple users can respond to emails
- It brings transparency in operations as everyone can view the conversation history
- No separate login credentials required
- No additional license required in many cases
How to Add a Shared Mailbox in New Outlook?
Typically, a Microsoft 365 admin is entrusted with the task of adding a member to the shared mailbox. Once such permission is granted, it appears automatically in Outlook’s Folder pane. Meanwhile, anyone can follow the below stepwise process to add shared mailbox in new Outlook:
Note: The user performing such a task must have a permission to access the shared mailbox. Secondly, such mailbox is properly configured by the admin. Thirdly, the Outlook account is connected to Exchange or Microsoft 365.
Steps to add a shared mailbox:
- Browse the Outlook 365 application
- Navigate to File
- Then go to Info
- Click Account Settings > Account Settings
- Click on your email account
- After this press Change
- Click More Settings
- Click Advanced
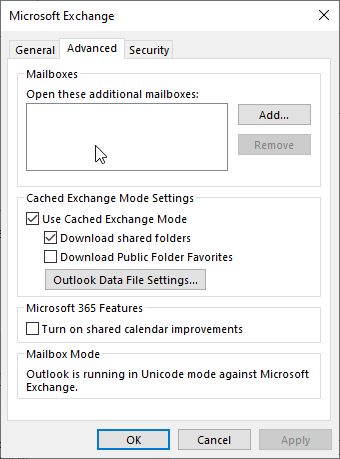
- Then click Add…
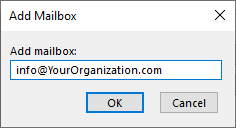
- Now enter email address of the shared mailbox, then press OK
- After this press Apply > OK
- Click Next > Done
- Restart Outlook
- After the sync, the Outlook download the shared mailbox
Issues That May Arise While Adding a Shared Mailbox:
This part of the post will shed light on common issues and their solutions that may arise while adding a shared mailbox:
Issue 1: Shared Mailbox Not Visible
- Cause: Permission not assigned
- Solution: Contact admin
Issue 2: Cannot Send Emails from Shared Mailbox
- Cause: Missing “Send As” permission
- Solution: Request proper access
Issue 3: Sync Issues
- Cause: Network or Outlook configuration
- Solution: Restart Outlook or re-add mailbox
Data Management of a Shared Mailbox:
The shared mailbox data is stored on the Exchange server. It syncs with Outlook via OST (Offline Storage Table) files. These data files (.ost) ensure offline access to the users. Even though these files (.ost) are secured due to encryption, but they may become orphaned in the absence of the Exchange Server. This scenario hampers the functioning of the process as users unable to access mailbox. They may not be able to receive/ send fresh emails. This is where professional OST to PST converter software becomes indispensable. Such software is extremely helpful. Tools like Stellar Converter for OST utilize advance algorithm. It doesn’t require Exchange Server availability. This converter software can also work without Outlook installation. It can efficiently deal with orphaned or inaccessible OST.
Benefits of Using Stellar Converter for OST:
- Can convert an oversized or encrypted Outlook data files (.ost)
- Converts OST files into PST and other file format (MSG, EML, RTF, HTML, etc)
- Recovers data from inaccessible mailboxes
- Supports large file sizes
- Converts all OST components (email messages, attachments, calendar, etc) with precision
- Doesn’t disturb folder structure and hierarchy
- Allows users to view a preview of all folders before conversion
Conclusion:
A shared mailbox enhances collaboration and professionalism. In the above guide, we explored its key advantages. We have learned how to integrate it seamlessly into your workflow. However, shared mailboxes still rely on a local OST cache to ensure fast performance. Experts recommend safeguarding and properly managing mailbox data. The best way is to utilize an OST to PST converter software to ensure data safety. Users can employ tools like Stellar Converter for OST to ensure data security in unforeseen circumstances.